I have seen quite a few posts on some lists asking about how to set up a programming environment for Android. While it is very straight forward, the documentation is all over the place. So, I decided to write this tutorial :).
In this tutorial, we will install Android SDK in eclipse (Galileo), we will add an SD Card to your emulator and put some pictures in it. I have written this tutorial with Windows users in mind but the process should not be very different for other platforms.
I have written this tutorial assuming that you already have JDK installed. If you don’t have it already installed then please install it before reading this. You can find a tutorial on how to install here.
Installing the SDK
- Download the latest eclipse IDE from
http://www.eclipse.org/downloads/.You can also download Galileo directly from here.
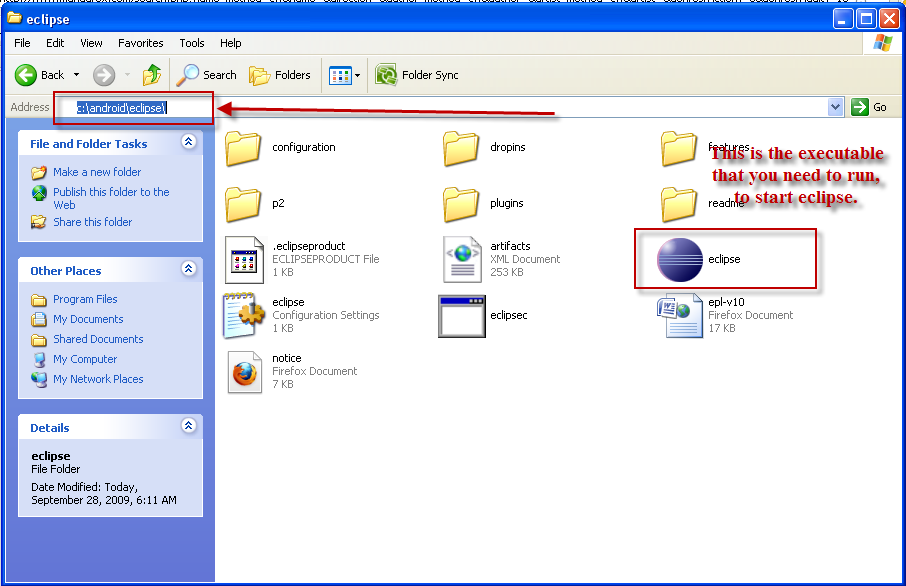
- Create a folder in your c:\ drive and name it android. The file you just downloaded (at least from the direct link I provided above) is a zip file which contains a folder called eclipse. Extract the zip file and place the folder in, c:\android. Now, you have eclipse installed in c:\android. Go into the eclipse folder. You will see an executable called eclipse. Double click it to run eclipse.
- Now, download the android SDK 1.6 (the latest as of this writing) for windows from the link below:http://developer.android.com/sdk/download.html?v=android-sdk-windows-1.6_r1.zipTo download the SDK for other platforms, go here :http://developer.android.com/sdk/1.6_r1/index.html
- Extract the contents of the zip file in c:\android\. Now, you will have 2 folders in c:\android\. One is eclipse and the other is android-sdk-windows-xxx.android-sdk-windows-xxx folder contains another folder called tools. We need to add this folder to the system’s PATH variable. To do that, Click on Start, then right click on “My Computer” and click on “Properties” in the menu that pops up.
The “System Properties” dialog will pop up. Click on the “Advanced” tab and then click on “Environment variables”. Another dialog will appear.
Run eclipse. Click on Help -> Install New Software.
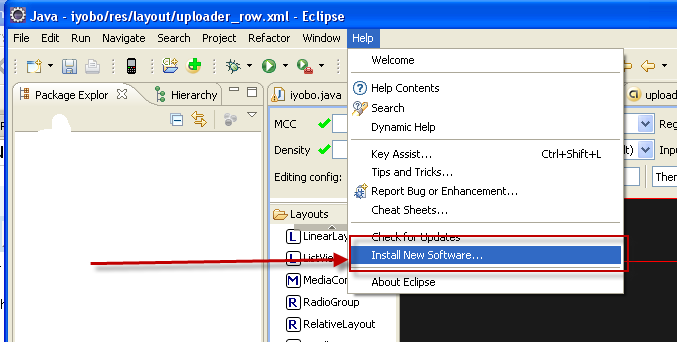
An install dialog will appear. Click on “Add”, another dialog will appear. Type in Android for name and put in https://dl-ssl.google.com/android/eclipse for Location. Then click OK. Click on next, check both the checkboxes and click next. Eclipse will start downloading the plugin and install it. You will be asked to restart eclipse after the installation is done. Click on “Yes” when it asks you to restart. Eclipse will restart and you can, now, create Android projects!

Now that the basic installation is done. Let’s setup the SC Card.
Setting up the SD Card
Creating the SD card is very easy.
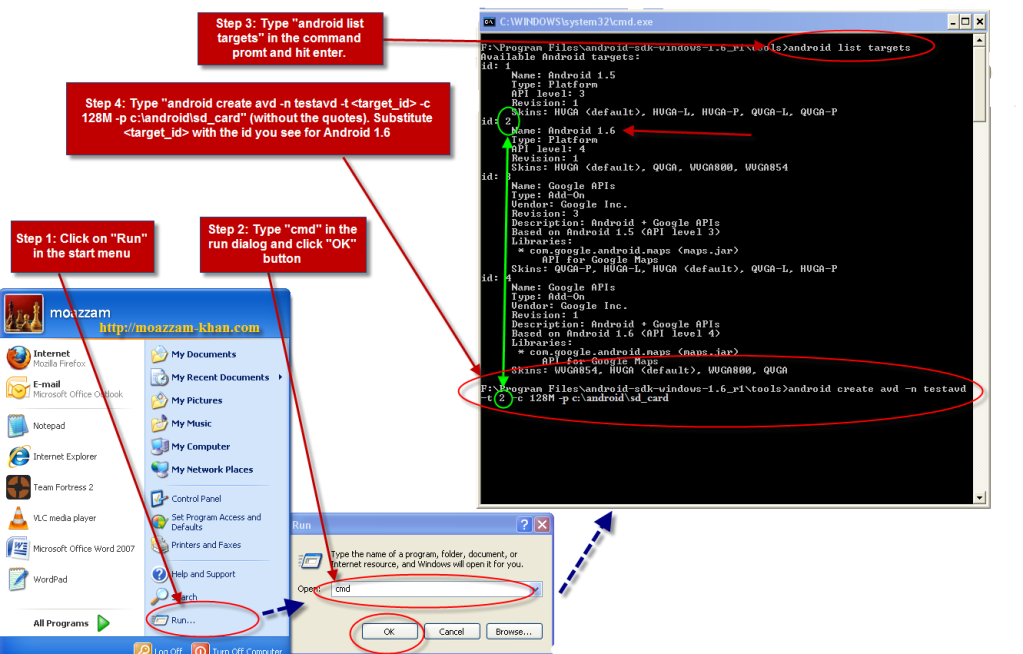
- Click on Start -> Run. The run dialog will appear
- Type “cmd” (without the quotes) and hit enter or click the OK button. A commant prompt window will appear.
- Type “android list targets” in it and hit enter. It will show you a list of targets. Get the id for Android 1.6. It will most probably be 2
- Type the command “android create avd -n testavd -t <target_id> -c 128M” (without the quotes) and hit enter. Make sure to subsitute the <target_id> with the actual ID you got from “android list targets” command. Since it will most probably be 2, the command will look like this “android create avd -n testavd -t 2 -c 128M (again without quotes).
- Press enter 1 more time
Viola! you have created your SD Card for the emulator. The next time you start the emulator, you will be able to access it. Below is an illustration to make things easy.
When I created my SD card, I needed to get some pictures on it. So, I used an external program called winimage to do that.
Working with your SD card
- Download winimage from http://www.winimage.com/download.htm. You can either get the zip file or the exe file. I downloaded the zip file, extracted it and use that.
- Run winimage.exe and make sure your emulator is not running.
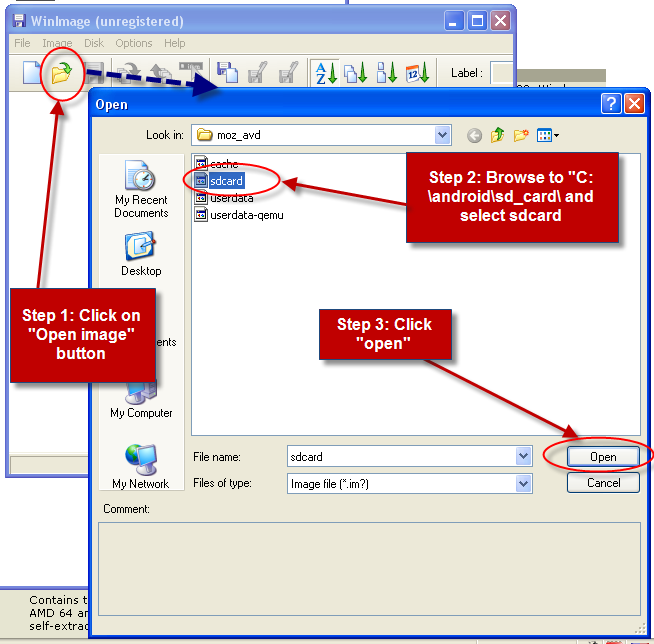
- Click on Open image icon. Browse to c:\android\sd_card\ folder. Select sdcard and click OK button. Winimage will open the sdcard image. Now, you can browse the file structure and add files, delete files, etc. After you are done, make sure to close winimage or you won’t be able to access the SD card from the emulator.
As always here’s an illustration:
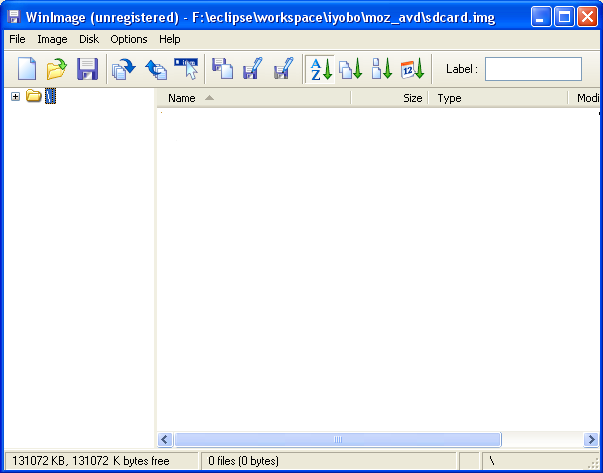
Now, we have an the SD Card image open. Let’s create a folder called “media” and put some pictures in it. When you take pictures with your phone’s camera they are stored in the media folder in your SD Card.
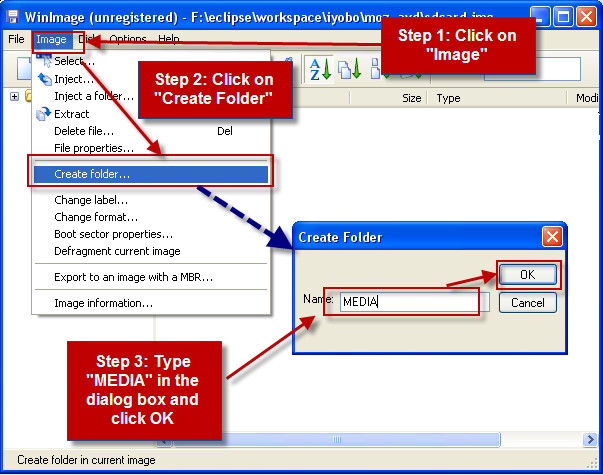
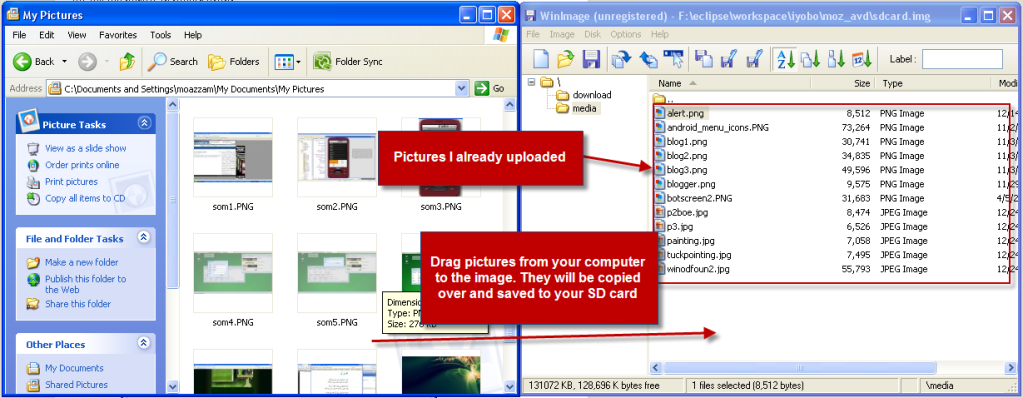
To create the media folder, click on Image, then on Create Folder. A dialog box will appear. Type “MEDIA” in it. and Click OK. After the folder is created, you can drag and drop pictures from your computer to the media folder just like you would normally do it when copying files from one location on your computer to another.
Leave a Reply